For a project I was specifically asked to build an API using Python Django. So, my first starting point was to google “django cookiecutter” which immediately brought me to this amazing cookiecutter project. What I am going to demonstrate here is how to quickly setup the project (for the sake of completeness) and use Gitlab Continuous Integration to automatically unit test, run linters, generate documentation, build a container and release it.
Setup the project
We start with initiating the project using the mentioned cookiecutter project, although you can also use another cookiecutter or build on your existing project; you probably need to make some alterations here and there. Here is a small list of prerequisites:
- you have docker installed locally
- you have Python installed locally
- you have a Gitlab account and you can push using ssh keys
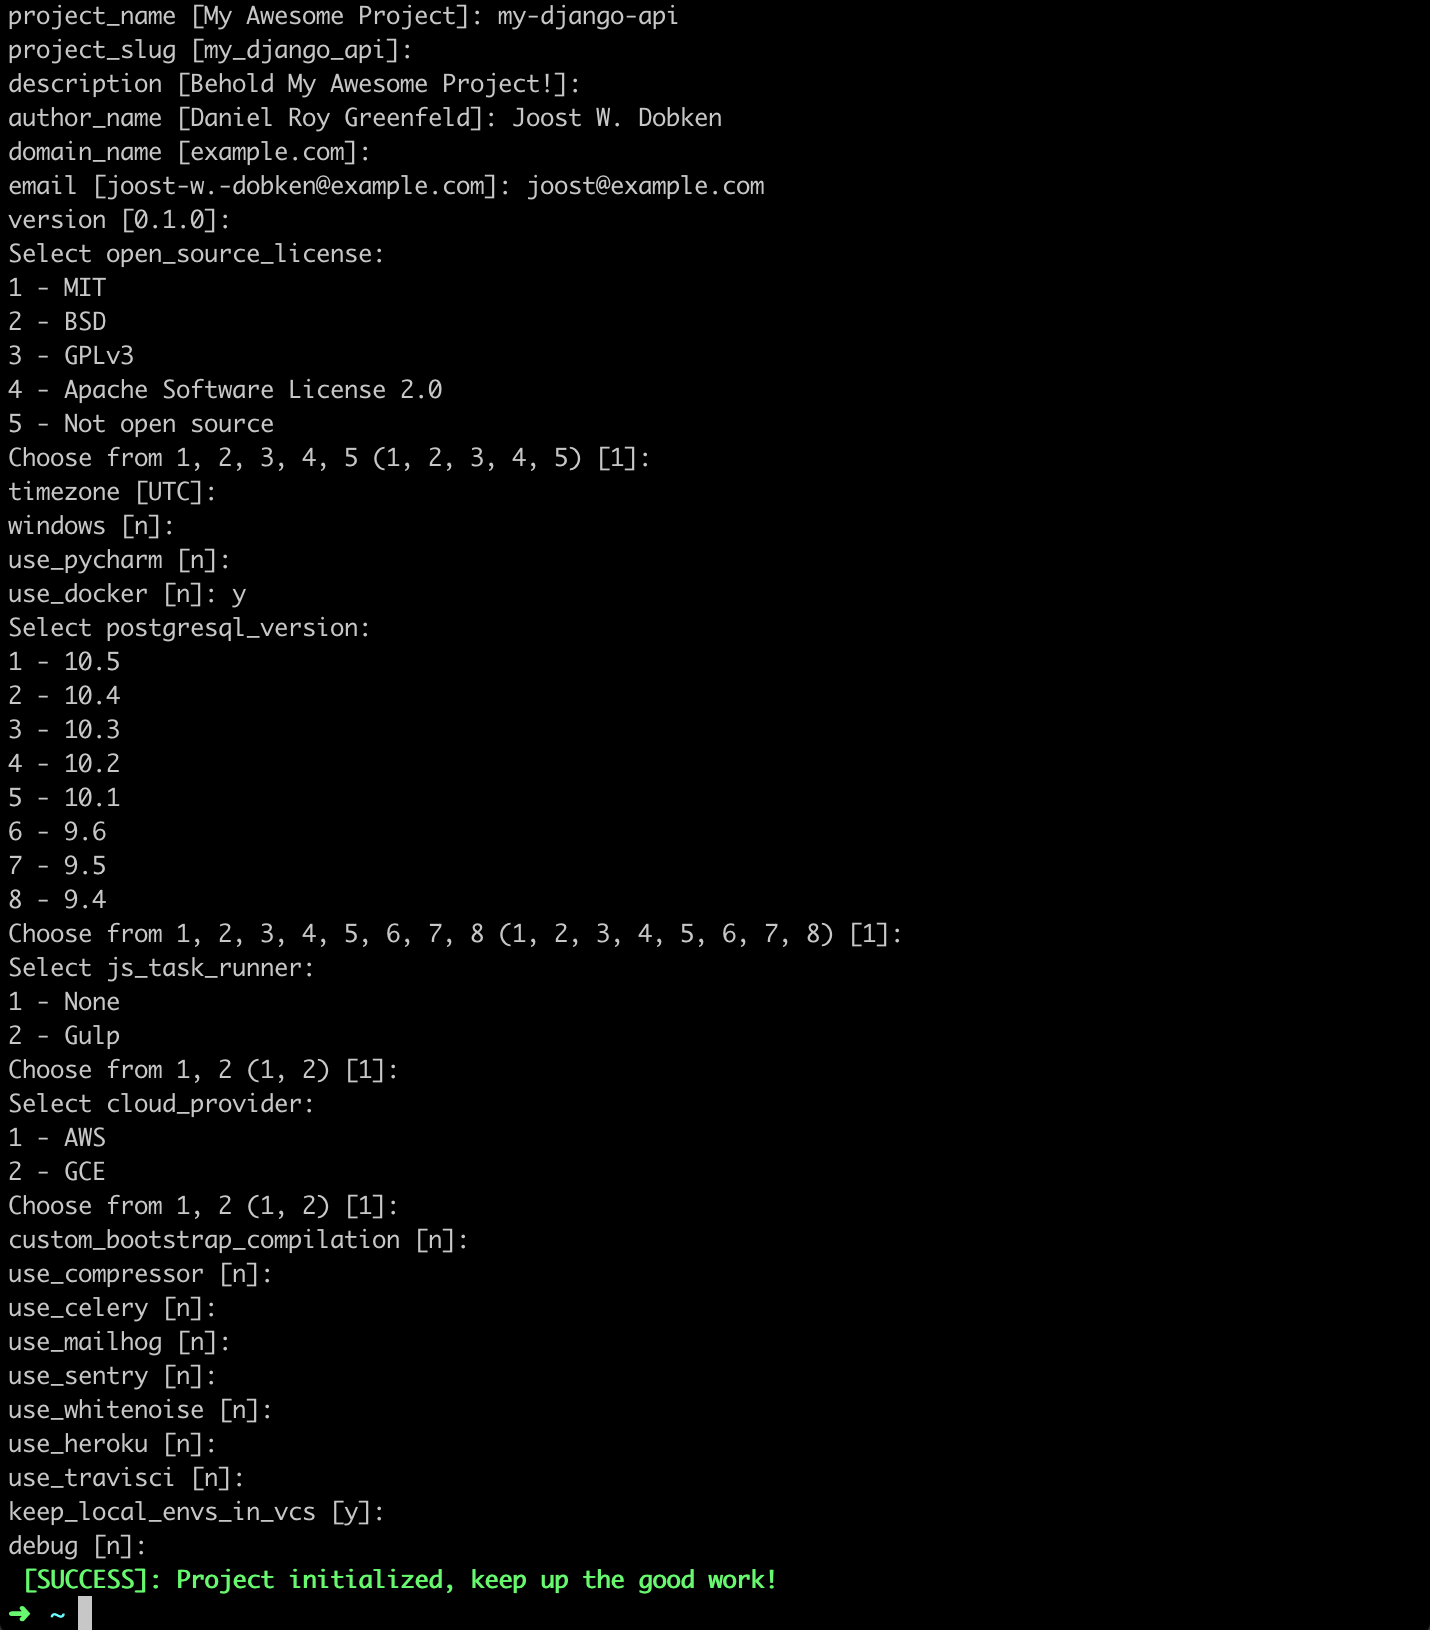
Now, install cookiecutter and generate the project:
pip install "cookiecutter>=1.4.0"
cookiecutter https://github.com/pydanny/cookiecutter-django
Provide the options in any way you like, so the Django project will be created. Type y when asked to include Docker (because that is why we are here!!!).
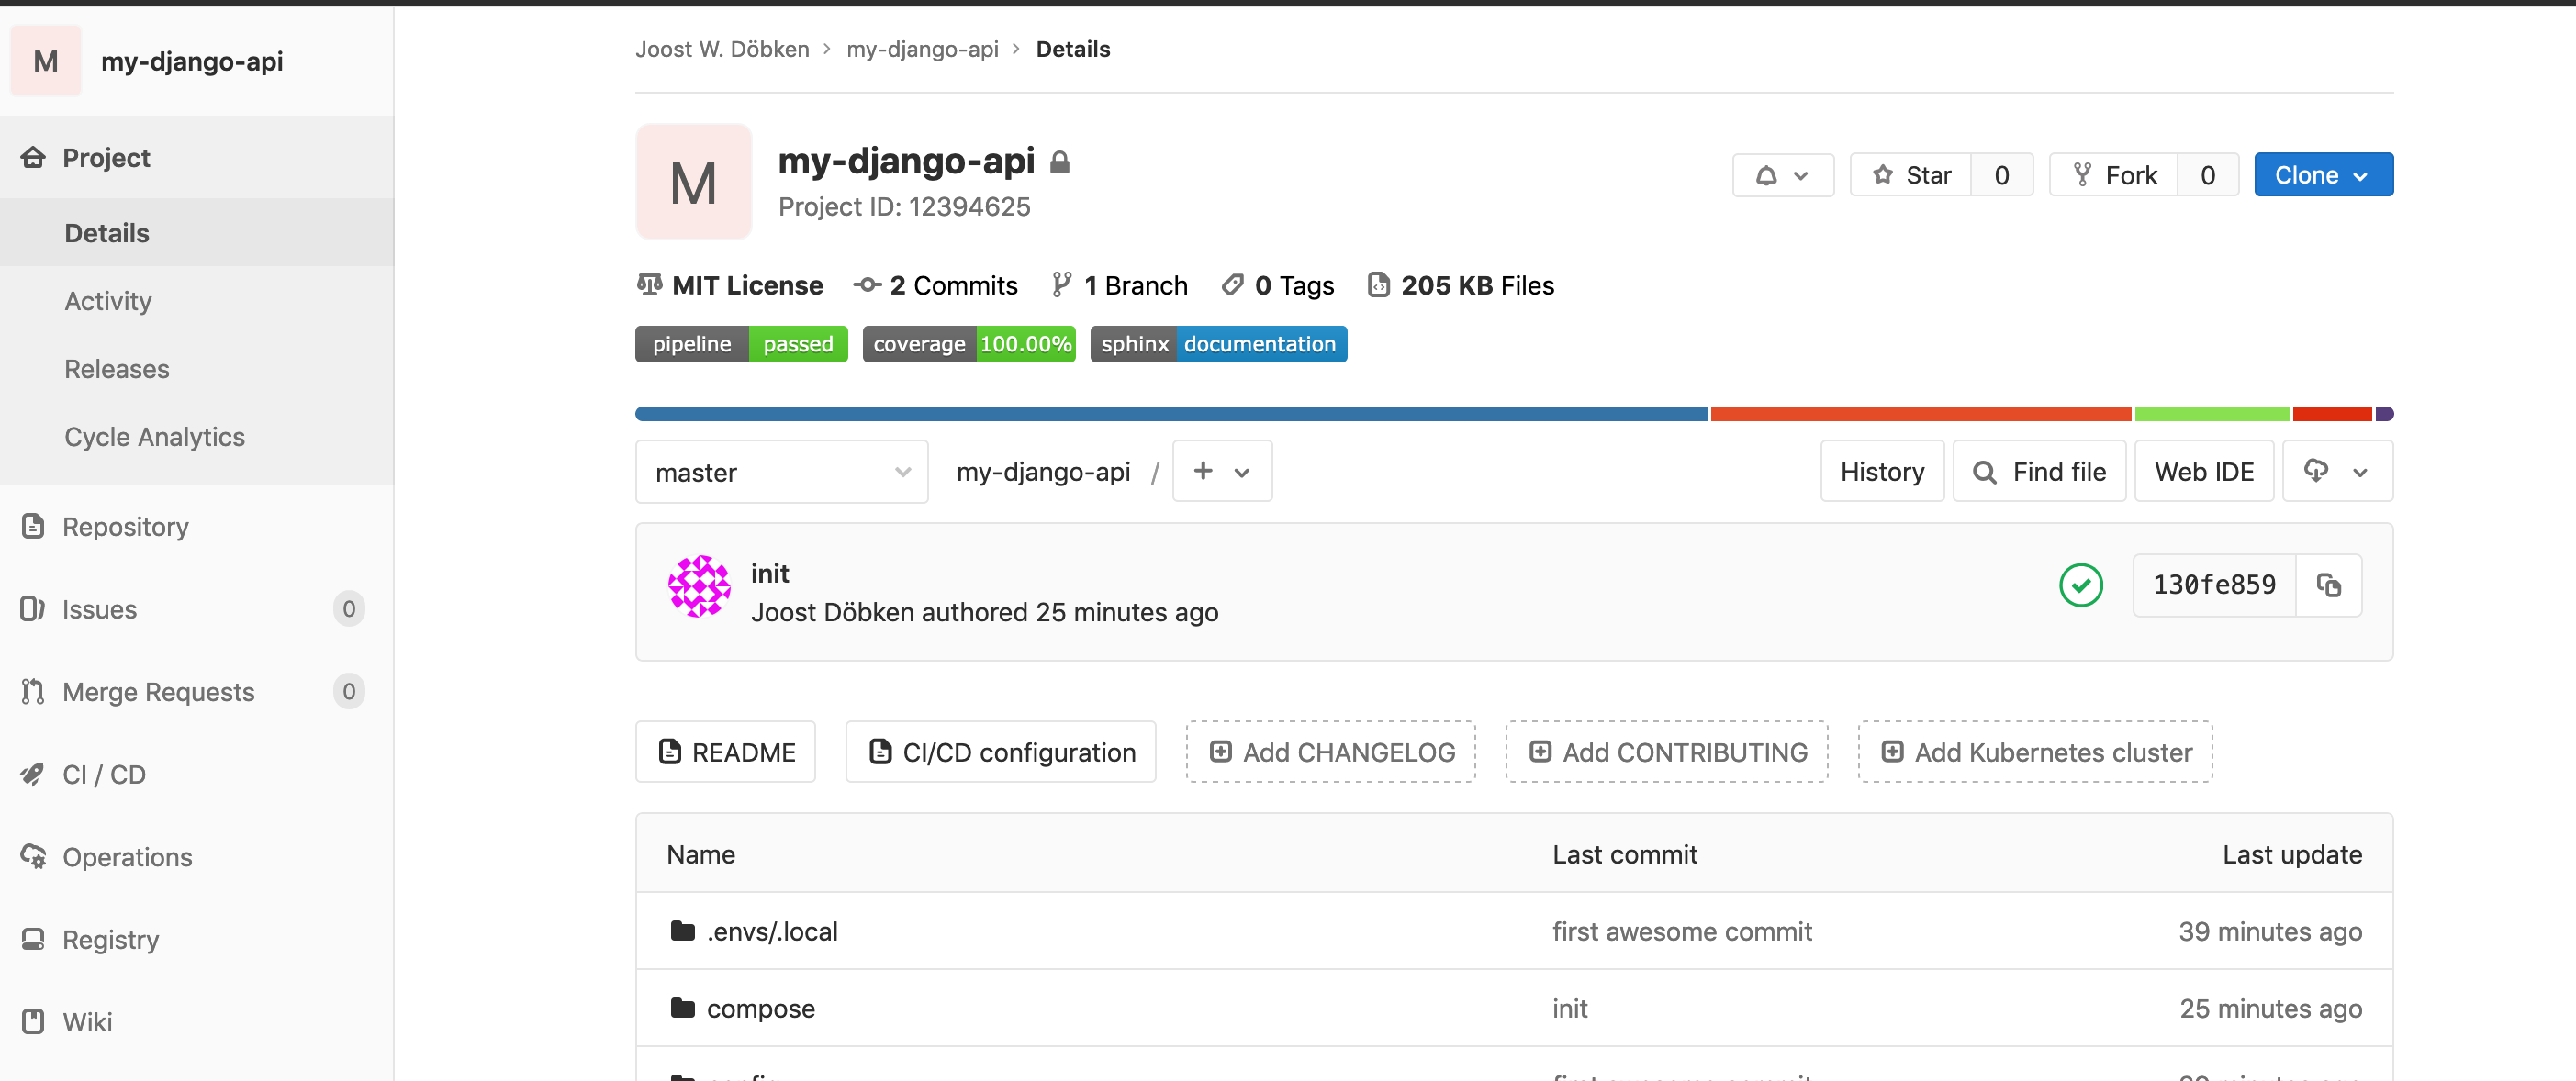
Enter the project, create a git repo and push it there:
cd my_django_api
git init
git add .
git commit -m "first awesome commit"
git remote add origin git@gitlab.com:jwdobken/my-django-api.git
git push -u origin master
Obviously replace my-django-api with your project name and jwdobken with your own Gitlab account name.
You can read here how to develop running docker locally. It is something I do with all my projects of any type; the dev and production environments are more alike and it has been years since I worked with something like virtual environments and I am not missing it!
Add a test environment
Make a test environment by copying the local environment:
cp local.yml test.yml
cp requirements/local.txt requirements/test.txt
cp -r compose/local compose/test
In compose/test/django/Dockerfile change requirements/local.txt to requirements/test.txt. You can make more alterations to the test environment later.
The Gitlab-CI file
Finally we get to the meat. Here is the .gitlab-ci.yml file:
image: docker:latest
services:
  - docker:dind

variables:
  DOCKER_HOST: tcp://docker:2375
  DOCKER_DRIVER: overlay2
  CONTAINER_TEST_IMAGE: $CI_REGISTRY_IMAGE:$CI_BUILD_REF_SLUG
  CONTAINER_RELEASE_IMAGE: $CI_REGISTRY_IMAGE:latest

stages:
  - test
  - build
  - release

test:
  stage: test
  image: tiangolo/docker-with-compose
  script:
    - docker-compose -f test.yml build
    # - docker-compose -f test.yml run --rm django pydocstyle
    - docker-compose -f test.yml run --rm django flake8
    - docker-compose -f test.yml run django coverage run -m pytest
    - docker-compose -f local.yml run --rm django coverage html
    - docker-compose -f local.yml run --rm django /bin/sh -c "cd docs && apk add make && make html"
    - docker-compose -f local.yml run django coverage report
  coverage: "/TOTAL.+ ([0-9]{1,3}%)/"
  artifacts:
    paths:
      - htmlcov
      - docs/_build
    expire_in: 5 days

build:
  stage: build
  script:
    - docker login -u gitlab-ci-token -p $CI_BUILD_TOKEN $CI_REGISTRY
    - docker build -t $CONTAINER_TEST_IMAGE -f compose/production/django/Dockerfile .
    - docker push $CONTAINER_TEST_IMAGE

release:
  stage: release
  script:
    - docker login -u gitlab-ci-token -p $CI_BUILD_TOKEN $CI_REGISTRY
    - docker pull $CONTAINER_TEST_IMAGE
    - docker tag $CONTAINER_TEST_IMAGE $CONTAINER_RELEASE_IMAGE
    - docker push $CONTAINER_RELEASE_IMAGE
  only:
    - master

pages:
  stage: release
  script:
    - mkdir -p public/coverage
    - mv htmlcov/* public/coverage
    - mkdir -p public/docs
    - mv -v docs/_build/html/* public/docs
  artifacts:
    paths:
      - public
    expire_in: 30 days
  only:
    - master
The test stage builds the container stack in the test environment, runs the unit tests with flake8, copies the html coverage report and catches the total coverage. Also, we misuse the test build to generate the sphinx documentation for which we need to install Make.
The build stage builds the production container and pushes it to the Gitlab container registry.
The release stage pulls the build container and tags it as the latest release before pushing it to the container registry.
The page part publishes the test and documentation artifacts with Gitlab Pages.
Push your code to Gitlab where you should find a running pipeline.

In the container registry of the project you can find two images: the latest master image and the latest release image. The page itself explains how to pull images from here to anywhere.
Badges
Gitlab enables badges on the repo page to give any specific information. On the Gitlab project page, go to Settings, go to Badges. Here you can add the following badges:
Pipeline status of the master branch:
- Link:
https://gitlab.com/%{project_path}/pipelines - Badge image URL:
https://gitlab.com/%{project_path}/badges/%{default_branch}/pipeline.svg
- Link:
https://<username>.gitlab.io/my-django-api/coverage/ - Badge image URL:
https://gitlab.com/%{project_path}/badges/%{default_branch}/coverage.svg?job=test
Documentation:
- Link:
https://<username>.gitlab.io/my-django-api/docs/ - Badge image URL:
https://img.shields.io/static/v1.svg?label=sphinx&message=documentation&color=blue
Note that the URL link of Gitlab Pages, for the test coverage report and documentation, is not straightforward. Replace your username with a groupname if you work in a group. In the case of a subgroup, provide the full path. Usually I end up with a bit of trial-and-error; this article explains most of it.
Pydocstyle
Finally, I highly recommend to check the existence and quality of your docstrings using pydocstyle. Add the following line to requirements/test.txt and requirements/local.txt in the Code quality section:
pydocstyle==3.0.0 # https://github.com/PyCQA/pydocstyle
Add the following lines to setup.cfg to configure pydocstyle:
[pydocstyle]
match = (?!\d{4}_).*\.py
And finally add the following line to .gitlab-ci.yml in the script section of the test stage (just after the build):
- docker-compose -f test.yml run — rm django pydocstyle
Be warned that the project does not comply with pydocstyle by default, so you will have to complete the code with docstrings to pass the test again.
Finally
We now have a fresh Django project with a neat CI pipeline on Gitlab for automated unit tests, documentation and container image release. You can later include Continuous Deployment to the pipeline; I left it out of the scope, because it depends too much on your production environment. You can read more about Gitlab CI here.
Currently the pipeline is quite slow mainy caused by the build of the images. The running time can be accelerated by caching dependencies.
There is a soft (10GB) size restriction for registry on GitLab.com, as part of the repository size limit. Therefore, when the number of images increases, you probably need to archive old images manually.